


AWS is an extremely complete and complex cloud with a huge number of services, but getting started with it is not that difficult. You just need to set up an AWS account and start with some first steps.
If you are curious about how to start with AWS, in this post I will cover what you need to do first.
We will see:
- How to create a new AWS account
- What's the AWS management console and how to start navigating through it
- What's an IAM user and how to create one
- What's the AWS CLI and how to configure it and start using it
- What's Boto3 library and how we can start using it
How to create a new AWS account
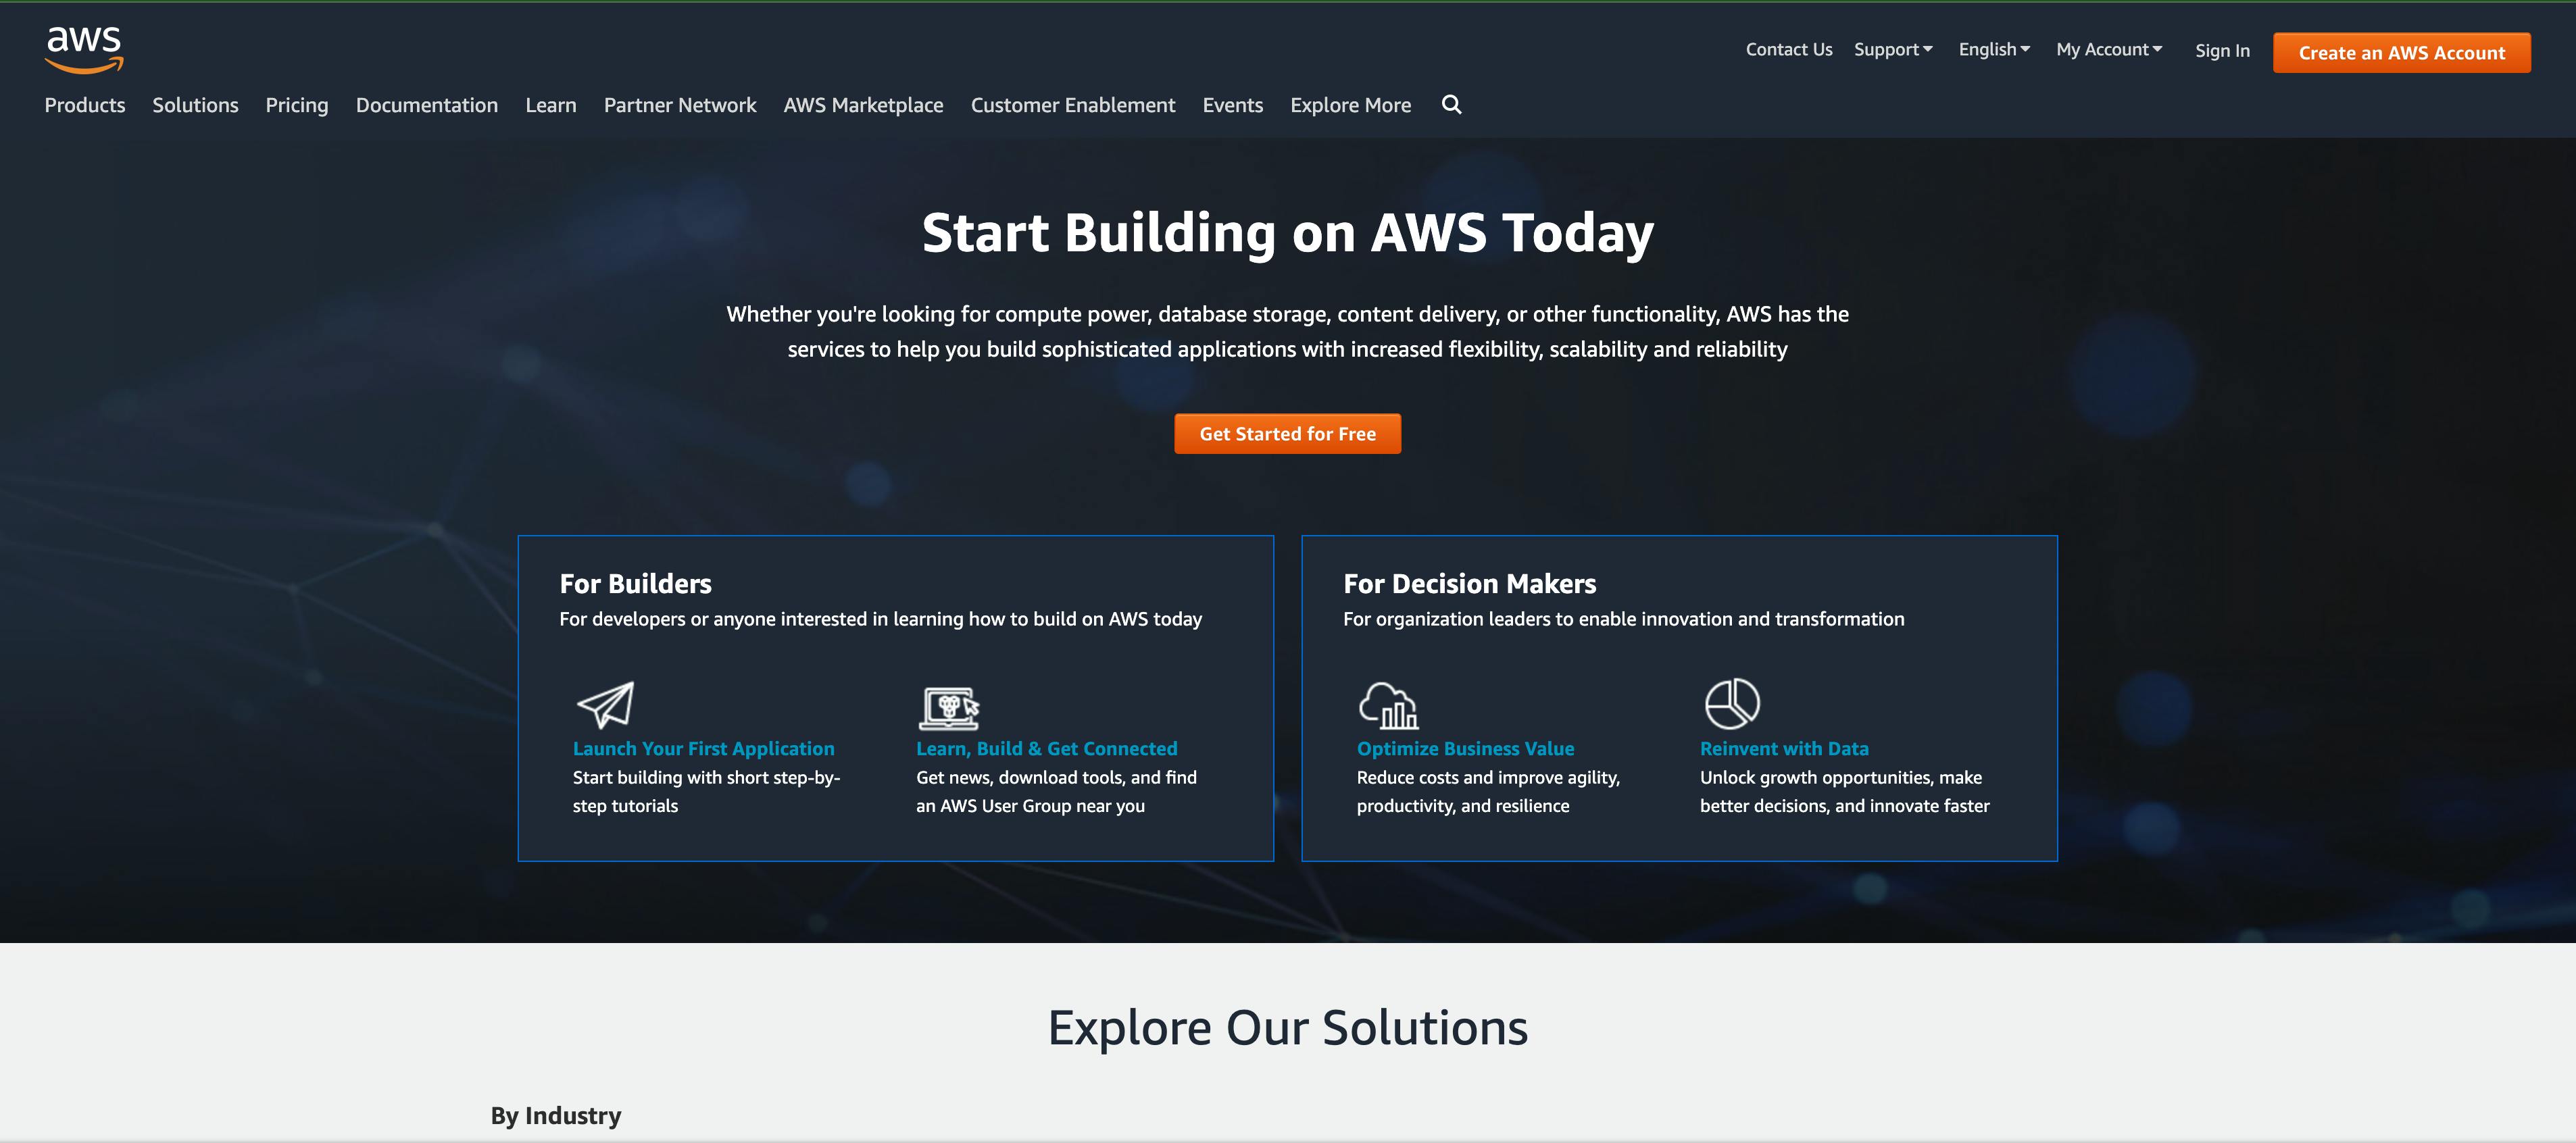
Go to aws.amazon.com Click on “Get started for free” and then “Create a Free Account”
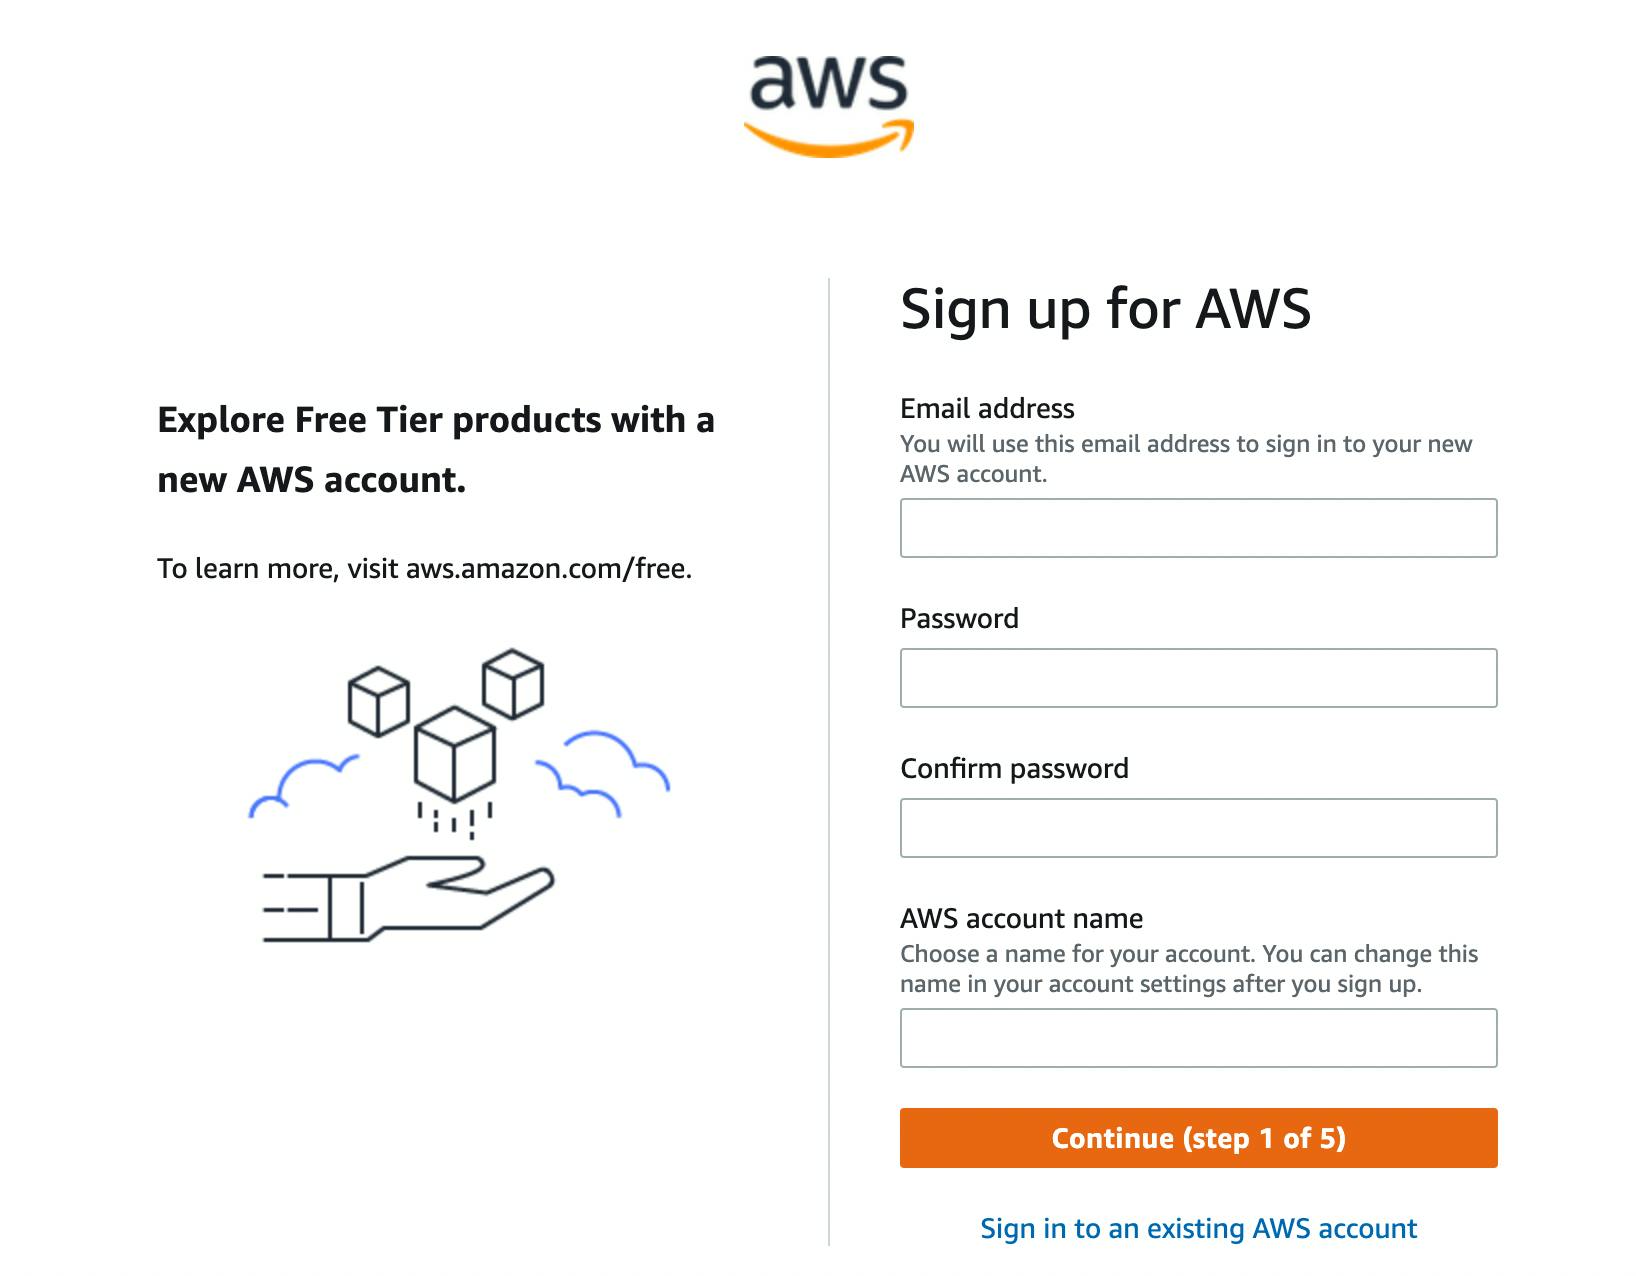
Write down the email address you want to use and choose a password and an account name:
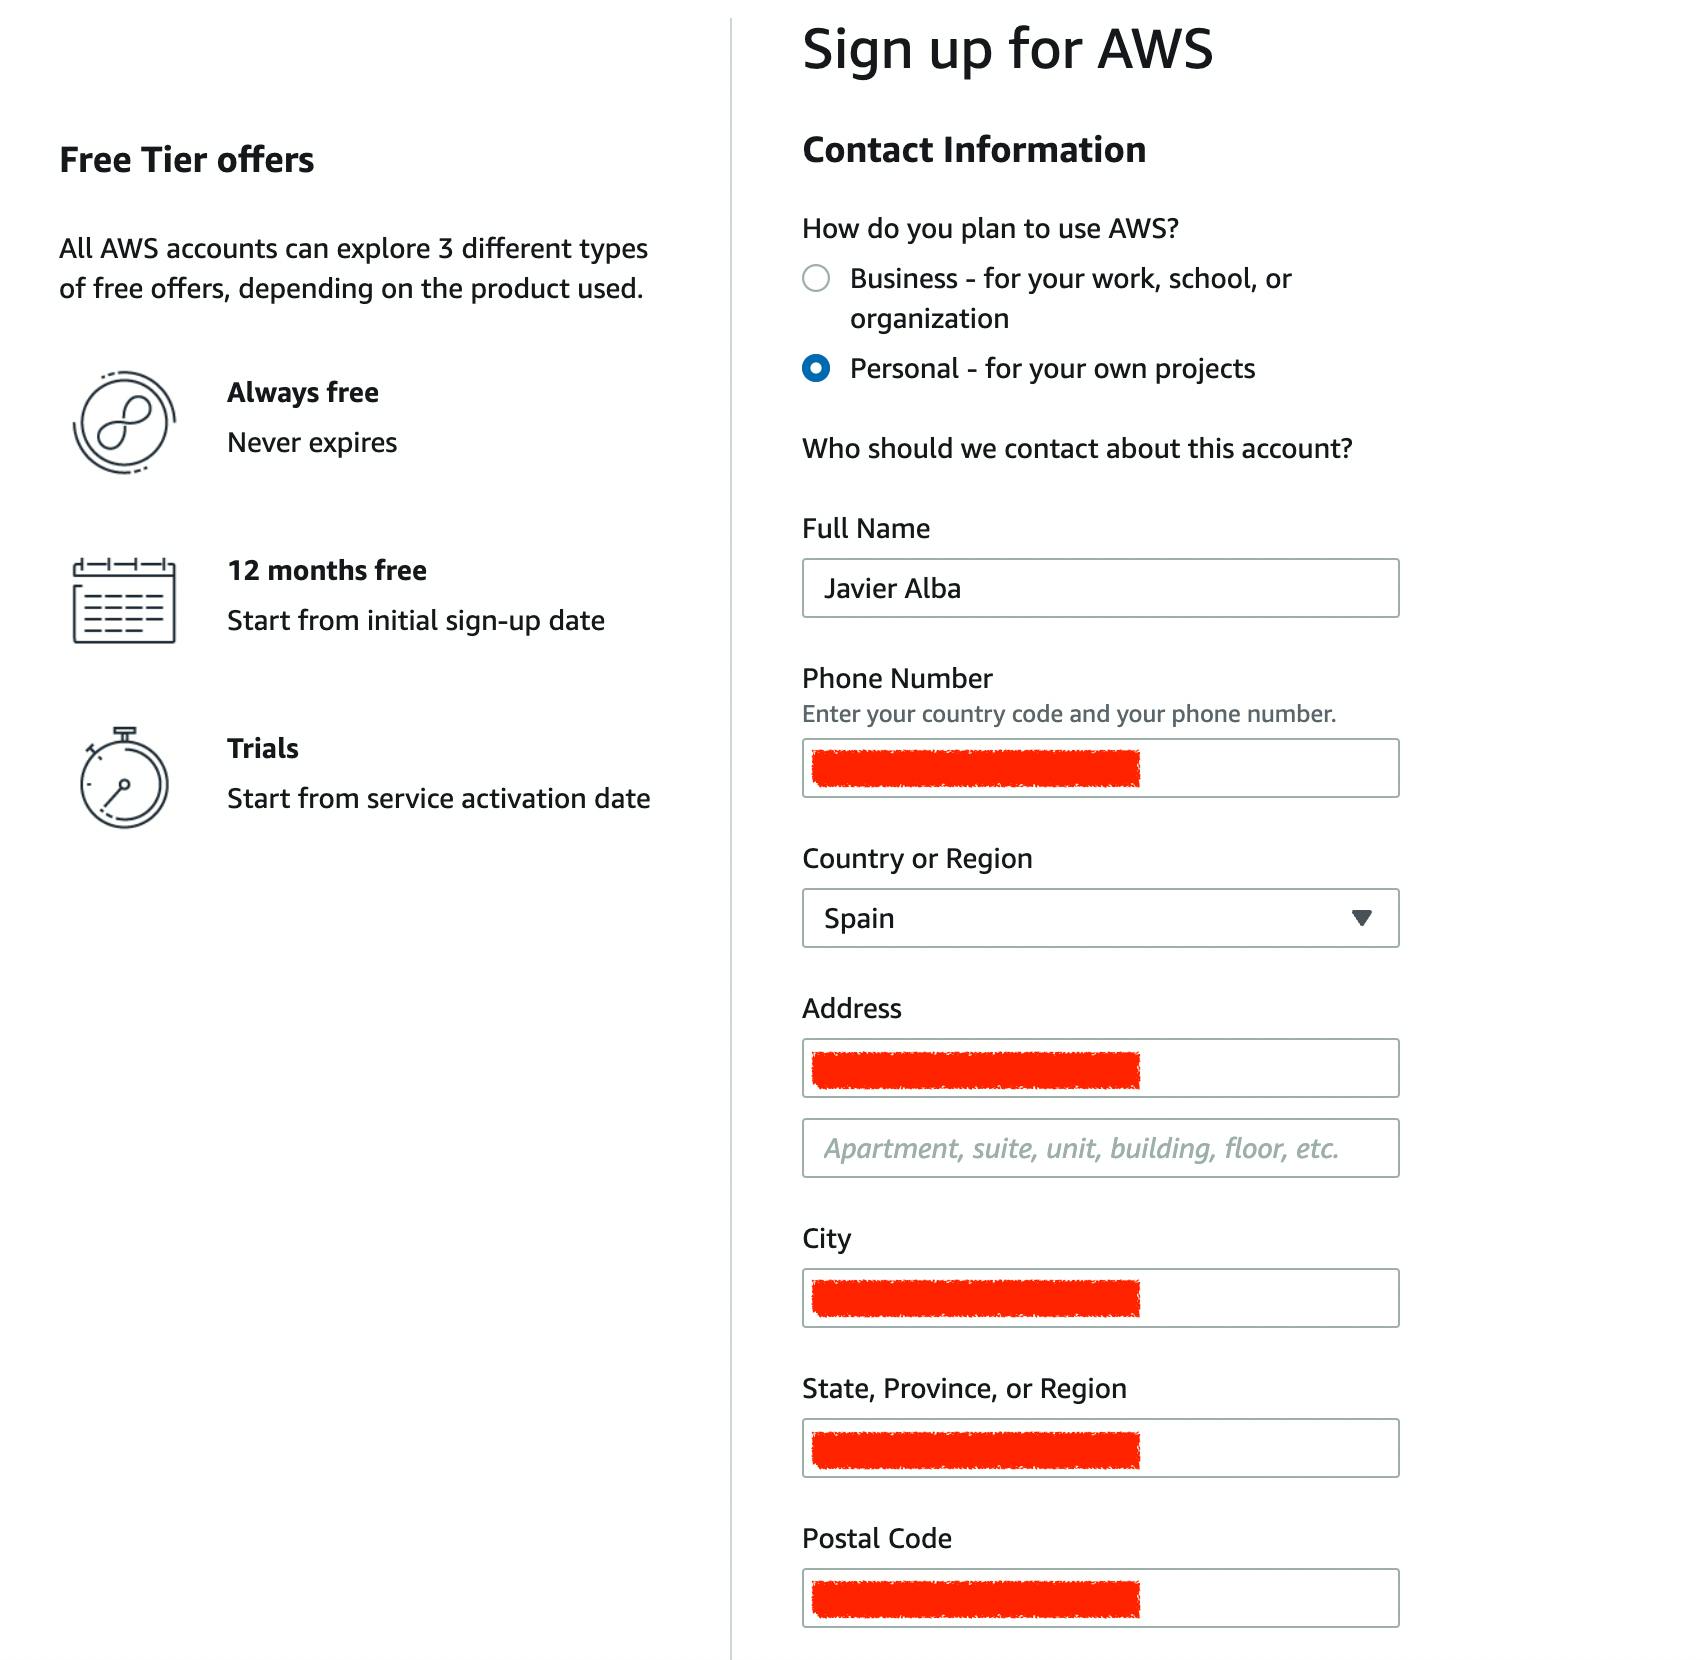
Then, you'll have to give more details about you, like name, phone number, address and choosing personal or professional account type. For now, I recommend going with a Personal account:
As a last step, you will need to add a credit card. This is because usage of AWS has a cost. They provide a "free tier", where some services are free (up to certain limits, or when using exactly the configuration included in the free tier), but you should keep in mind that depending on how you use AWS you can end up having costs even if you are using a Free-tier.
But fear not, following the steps in this post shouldn't create any costs in your AWS account.
After adding your credit card info (AWS will initially retain 1USD), your account is created and you need to validate it. Using your phone number, you can choose to receive an SMS or an automated call, and you will just need to enter the code you receive. After that, you should receive an email and your account should be fine to go.
You can see more details on how to create your AWS account in this link and in this video:
AWS Management Console
Now that you have your AWS account up and running, it's time to check what AWS has to offer. A good first place to look is the AWS Web Console, a web site where we can do almost anything with AWS. This is the place you will be usually visiting to create new infrastructure in AWS or to check how your existing services are doing.
All AWS services are listed here, each one with their different UIs and options. We will only do a quick overview and check a couple of services to see how they look like.
Accessing the console
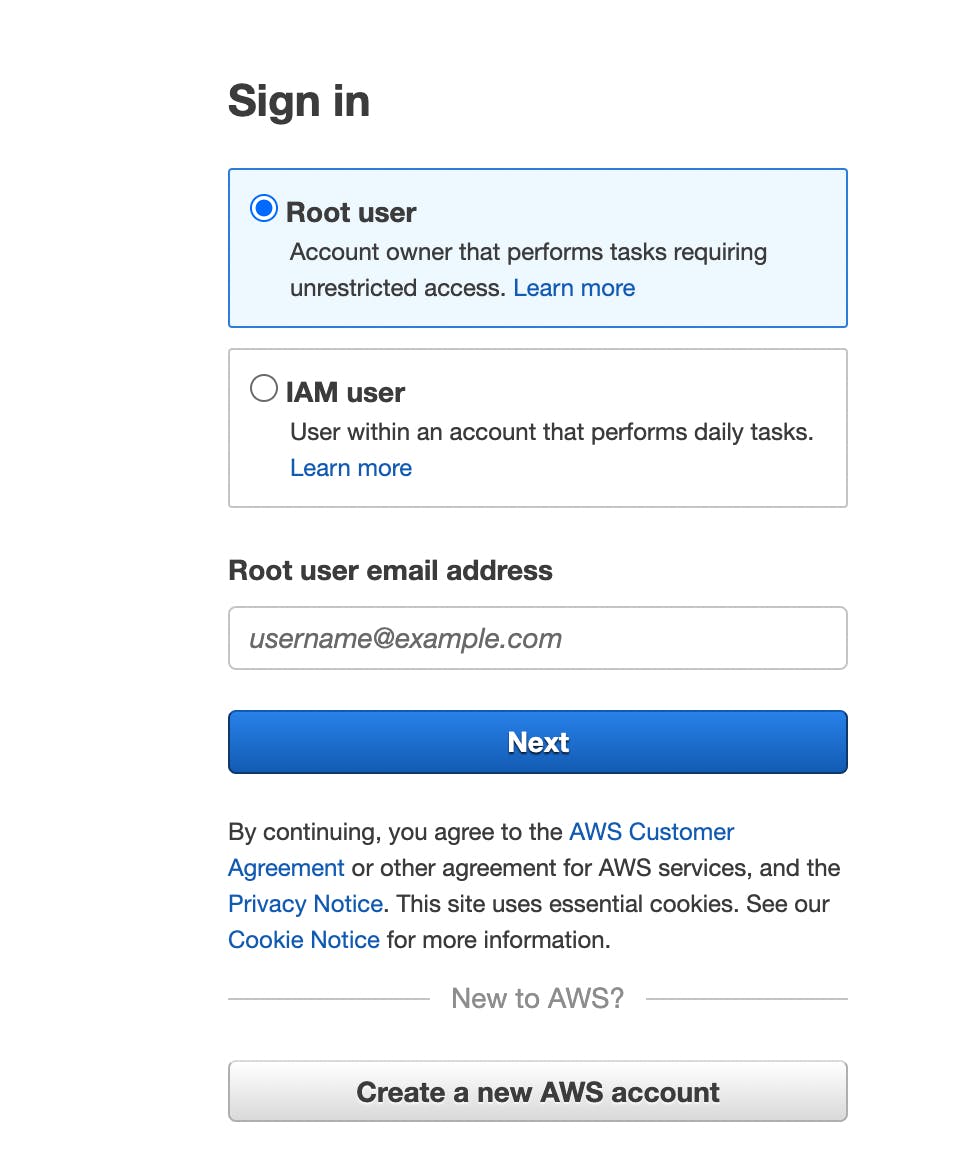
Go to aws.amazon.com/console, select "Log back in", and in the sign in form, select "Root user" and enter the email address you used for creating your account:
 Then, introduce the password you provided when you created your account, and you are in!
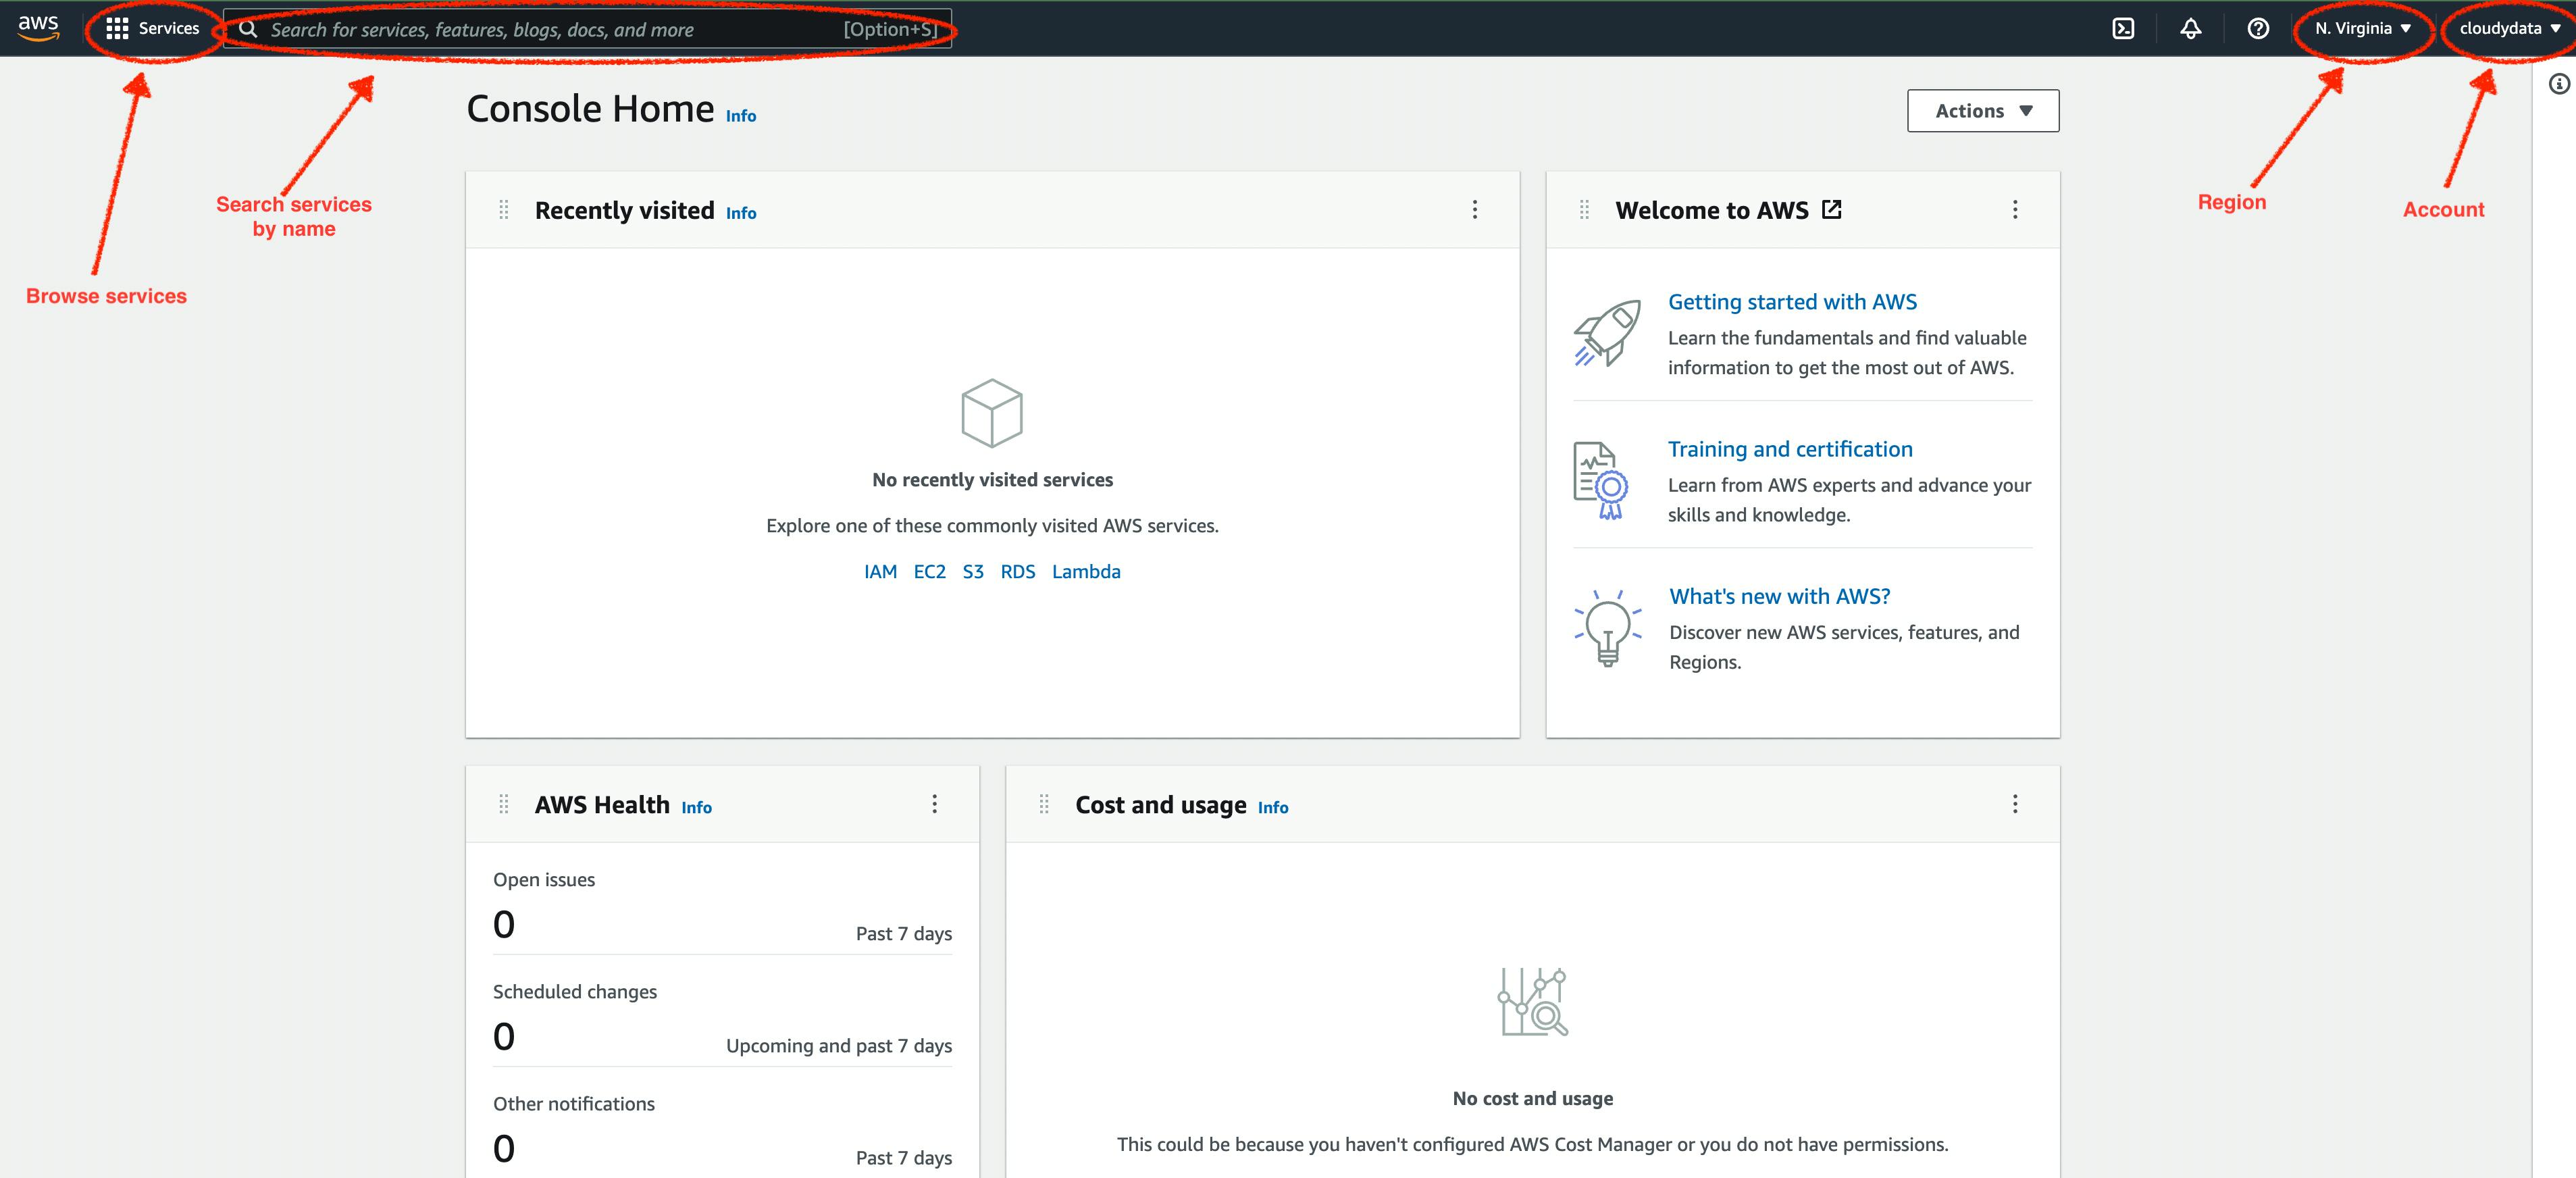
The image above shows how the new AWS console looks like initially. This new version of the console allows for more customisation than previous versions, since we can add widgets and sort them as we like.
An important part of the console is the top bar, where we find a service browser, a search box where we can look for services by name, a region selector and a section for our AWS account.
AWS Regions
AWS is a multi-region cloud. This means AWS has several datacenters all around the globe. We can have AWS services running in different regions. This is very useful if you need to have your compute processing close to your customers.
Some services are "global" (are not attached to a concrete region) but the majority of them can be used across different regions.
Initially, you can think of AWS regions as different deployments of AWS, isolated between them. You usually will start using just one region, but if later you go for a multi-region deployment for a concrete application you build, you will probably have the same application deployed independently on each region, without communication between them. (This is a simplification, but I think it helps to look at it this way if you're just starting with the cloud).
Navigating services in the console
A quick way of going to a service is typing it's name in the search box. Type "iam" in there, and you will see some results popping up:
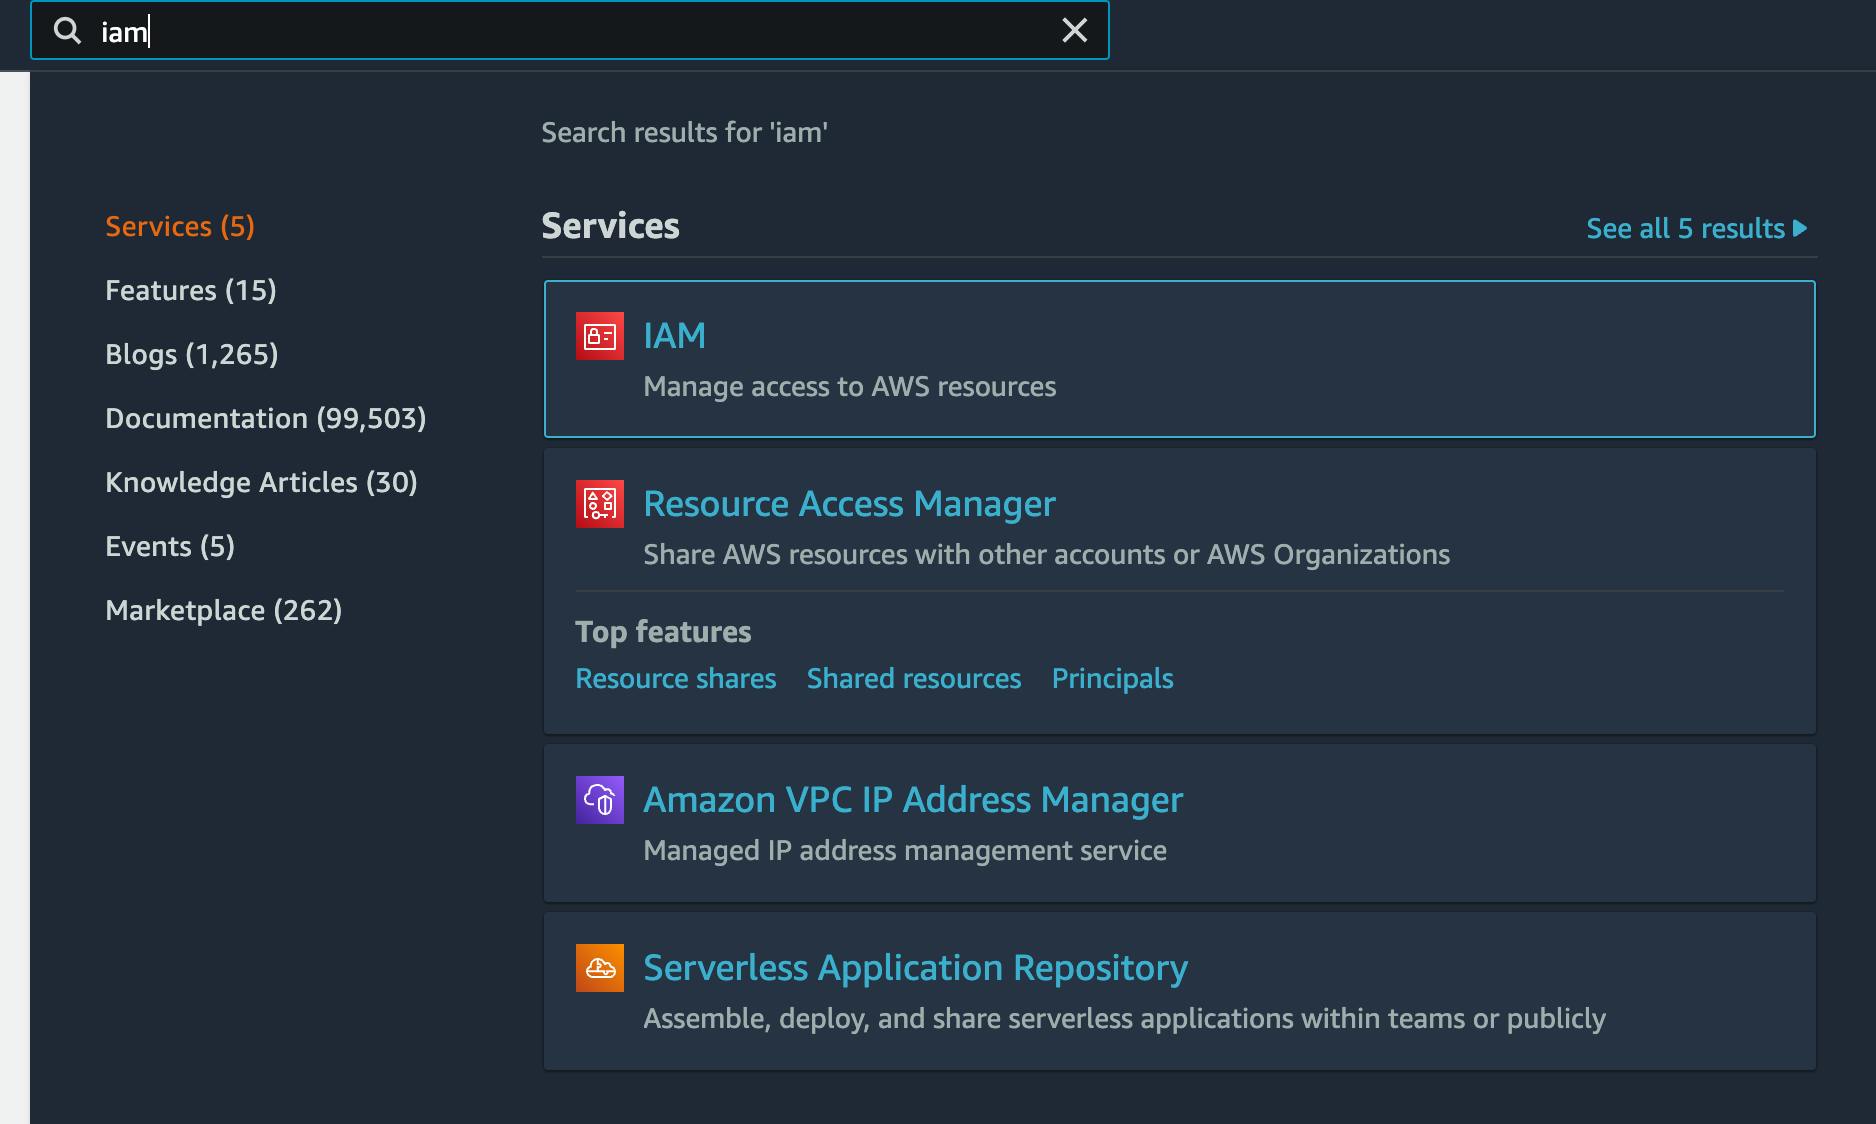
Let's select the first one and go to the IAM service.
Now we are in the IAM service UI.
Creating an IAM User
But, what's the IAM service all about? It's the part of AWS devoted to manage permissions. Imagine you have a company with different types of employees: developers, cloud engineers, product managers... etc. You will probably want to create different users and groups with specific permissions. This can be done with IAM users and groups.
Later in your AWS journey you will need also services talking with other services (e.g: a lambda function being able to read and write from/to S3). For that you will use IAM Roles.
But for now, let's just create a new IAM user to avoid using the management console with the account root user, which is not recommended.
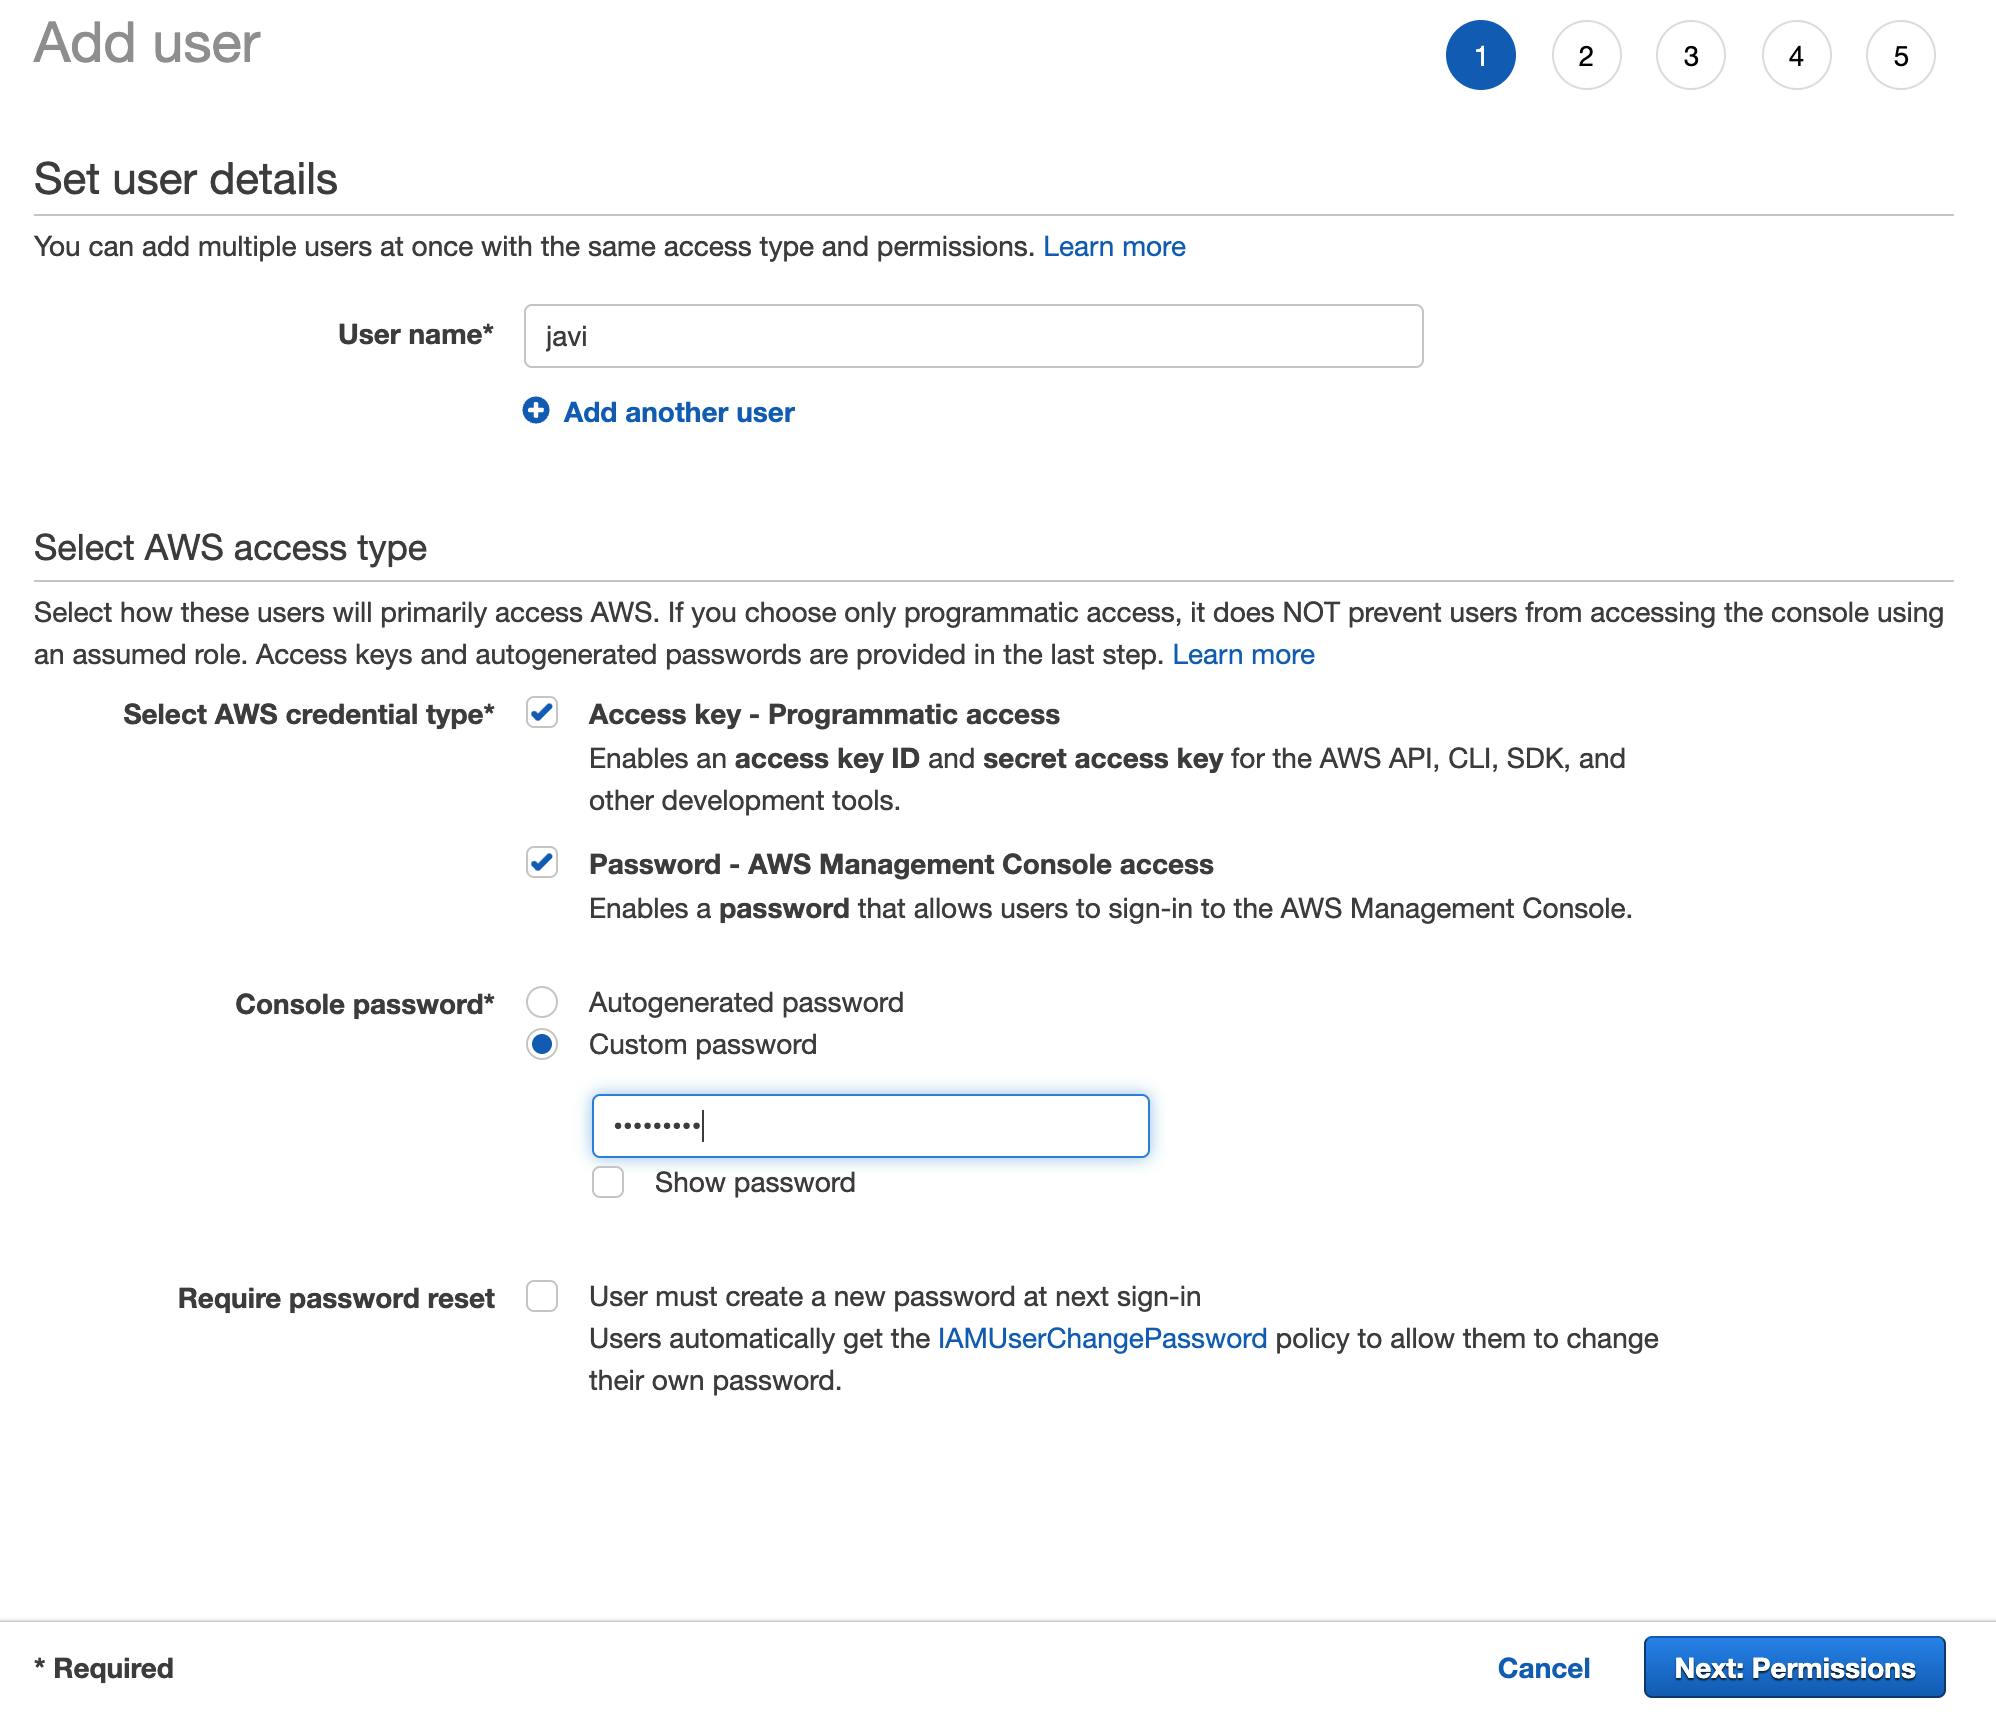
To do that, go to Users on the left, then click on the button Add Users on the right.
Select a name for your new user, and then you need to check what access types you want for the user. Check both of them (Access key & Password) since we want this user to be able to use AWS from both the web console and also programmatically (using the APIs, that we will see later).
Select a password , and click on Next
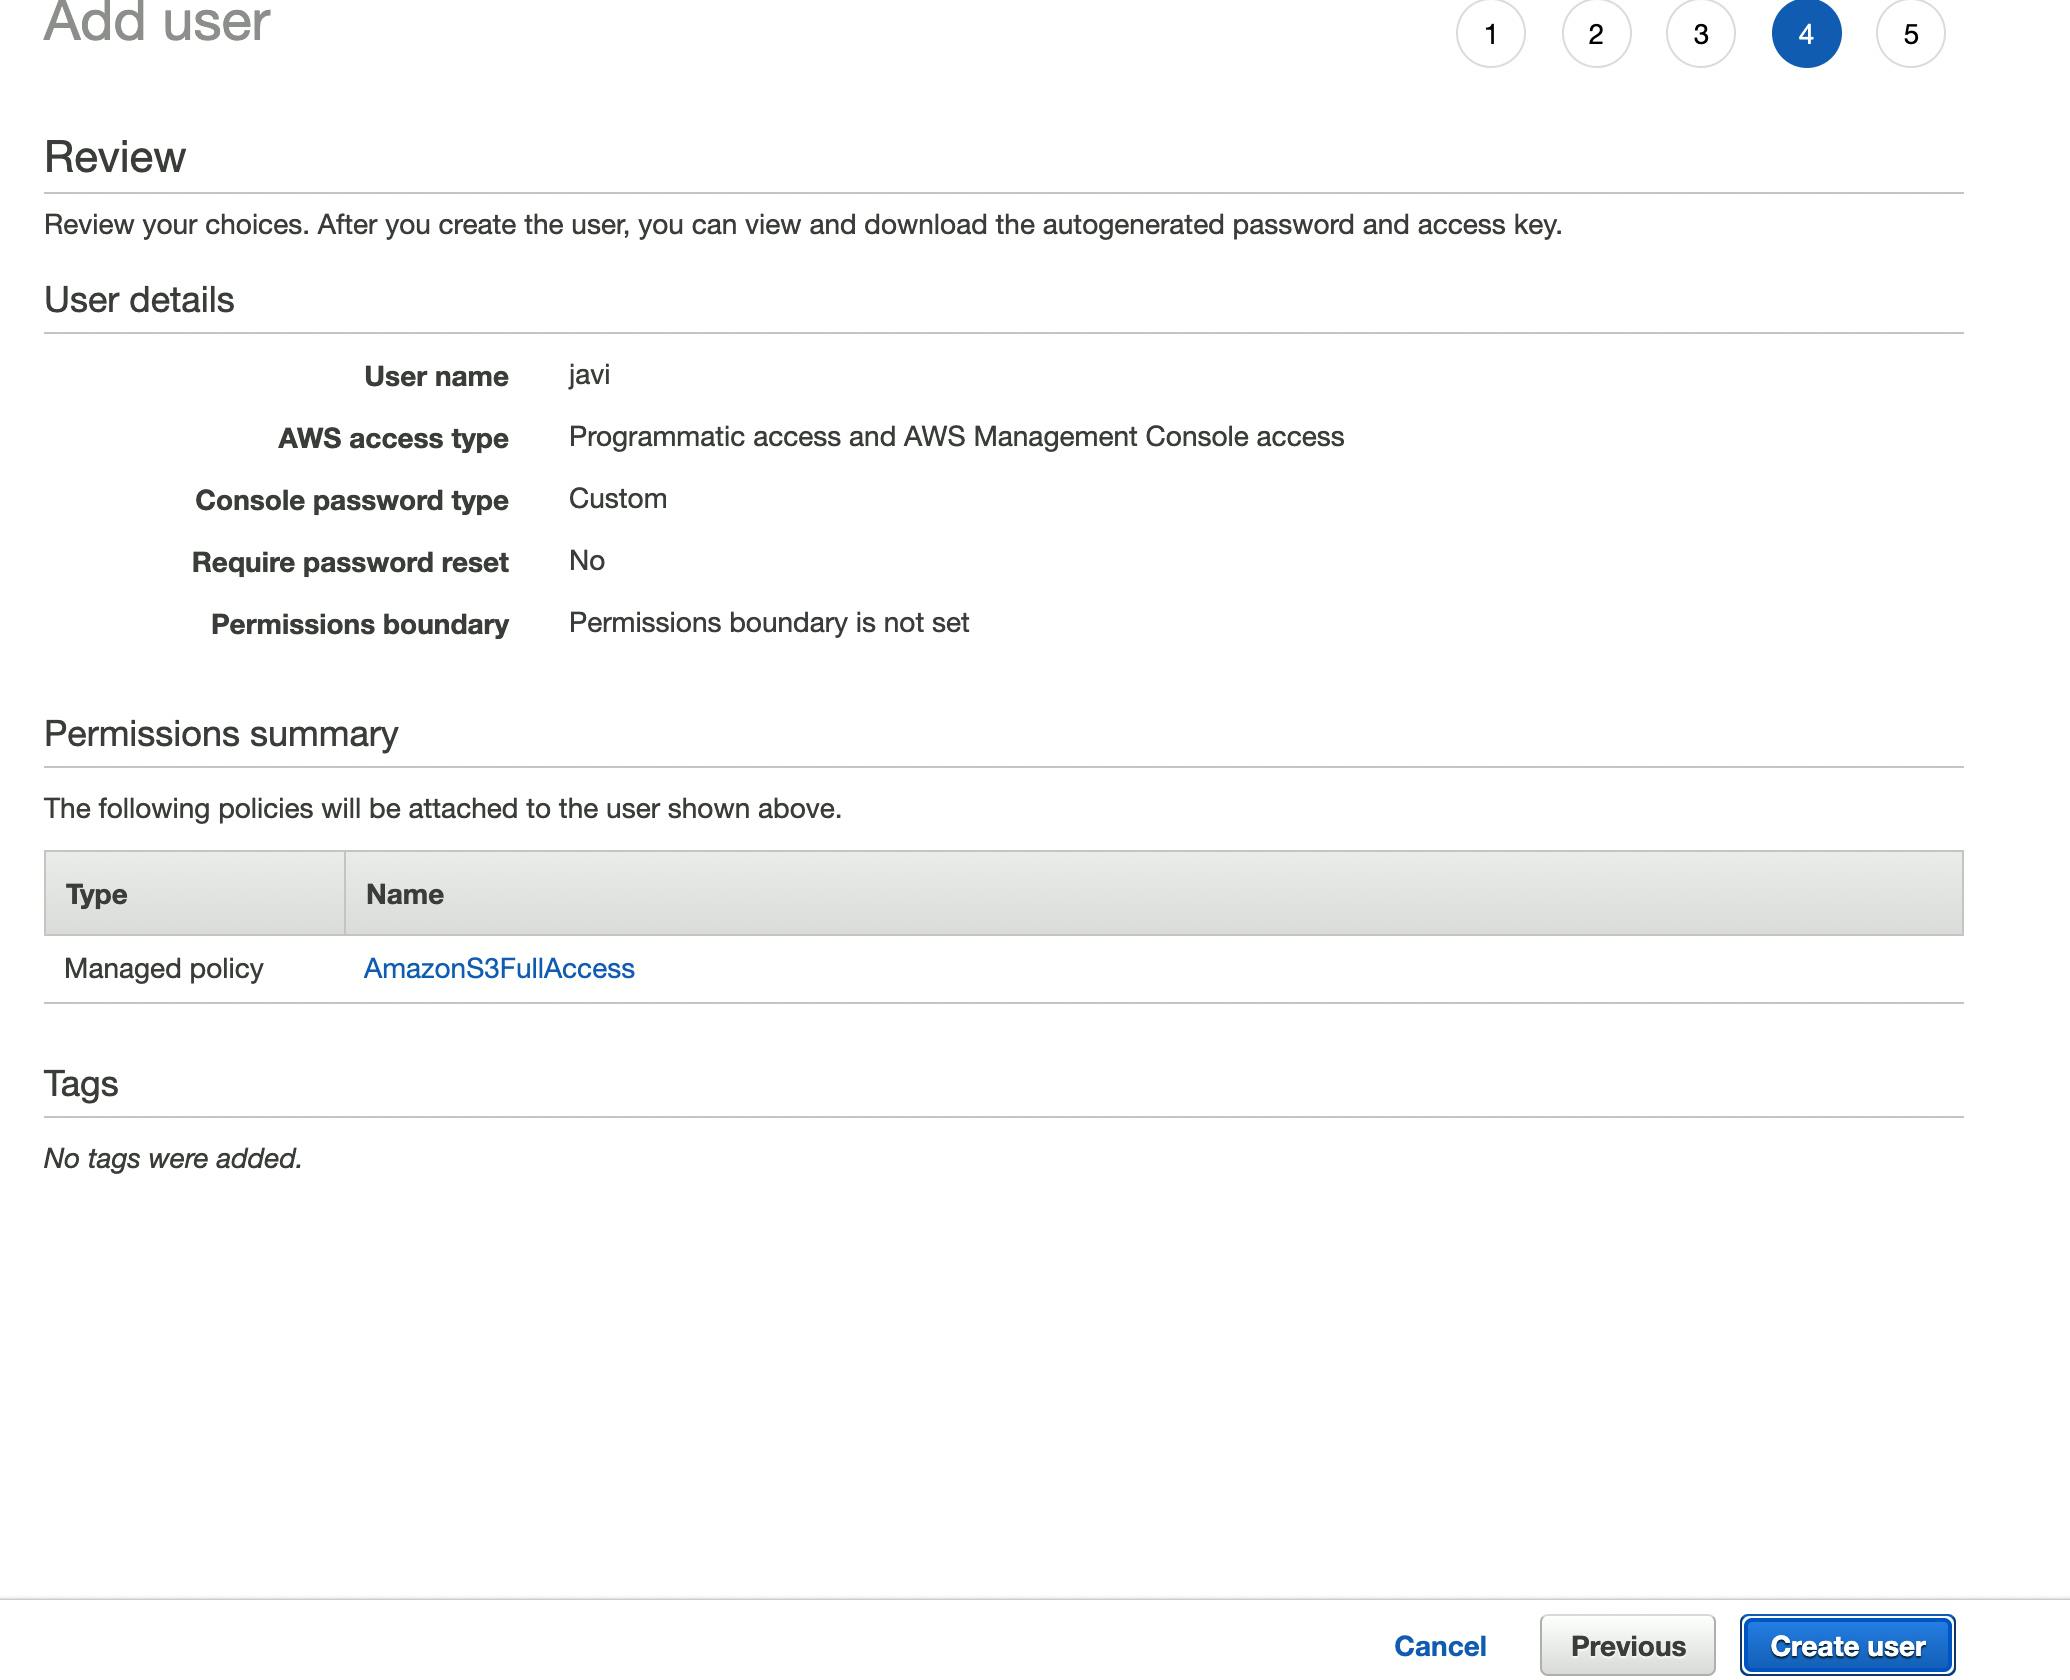
On the next page, we will skip for now the recommendation of creating a group, and will go to Attach existing policies directly. Type "s3" in the search box and select AmazonS3FullAccess policy.
This way, we are giving full permissions to the user, but only for one AWS service: S3. All the rest of services will not be accessible for him. Let's check.
Finish the user creation going to the Next page. Do not select tags for the moment , click Next again and finish the process clicking on Create user
You've finished creating the user. Write down the credentials (we will need them later).
We will also need our account ID, that can be copied from the account dropdown on the top right:
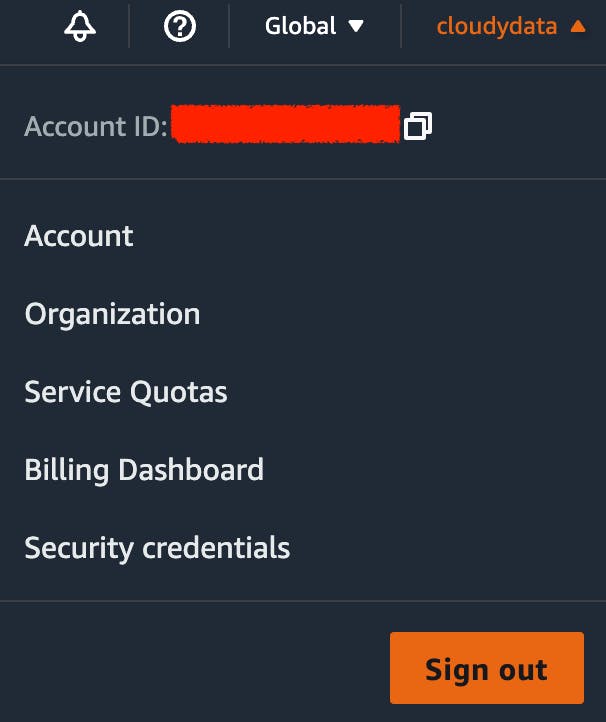
Finally, finish your root session clicking Sign out in the same account menu.
To log in with your new user, go to the AWS login form, select IAM user, paste your account ID number on the Account ID field, click Next and enter your IAM user name and password.
You should see a new AWS Management console. Now, if you try to access any service different than S3, you should get a permissions error. For instance, if you try to access IAM service again, you will see several errors displayed:
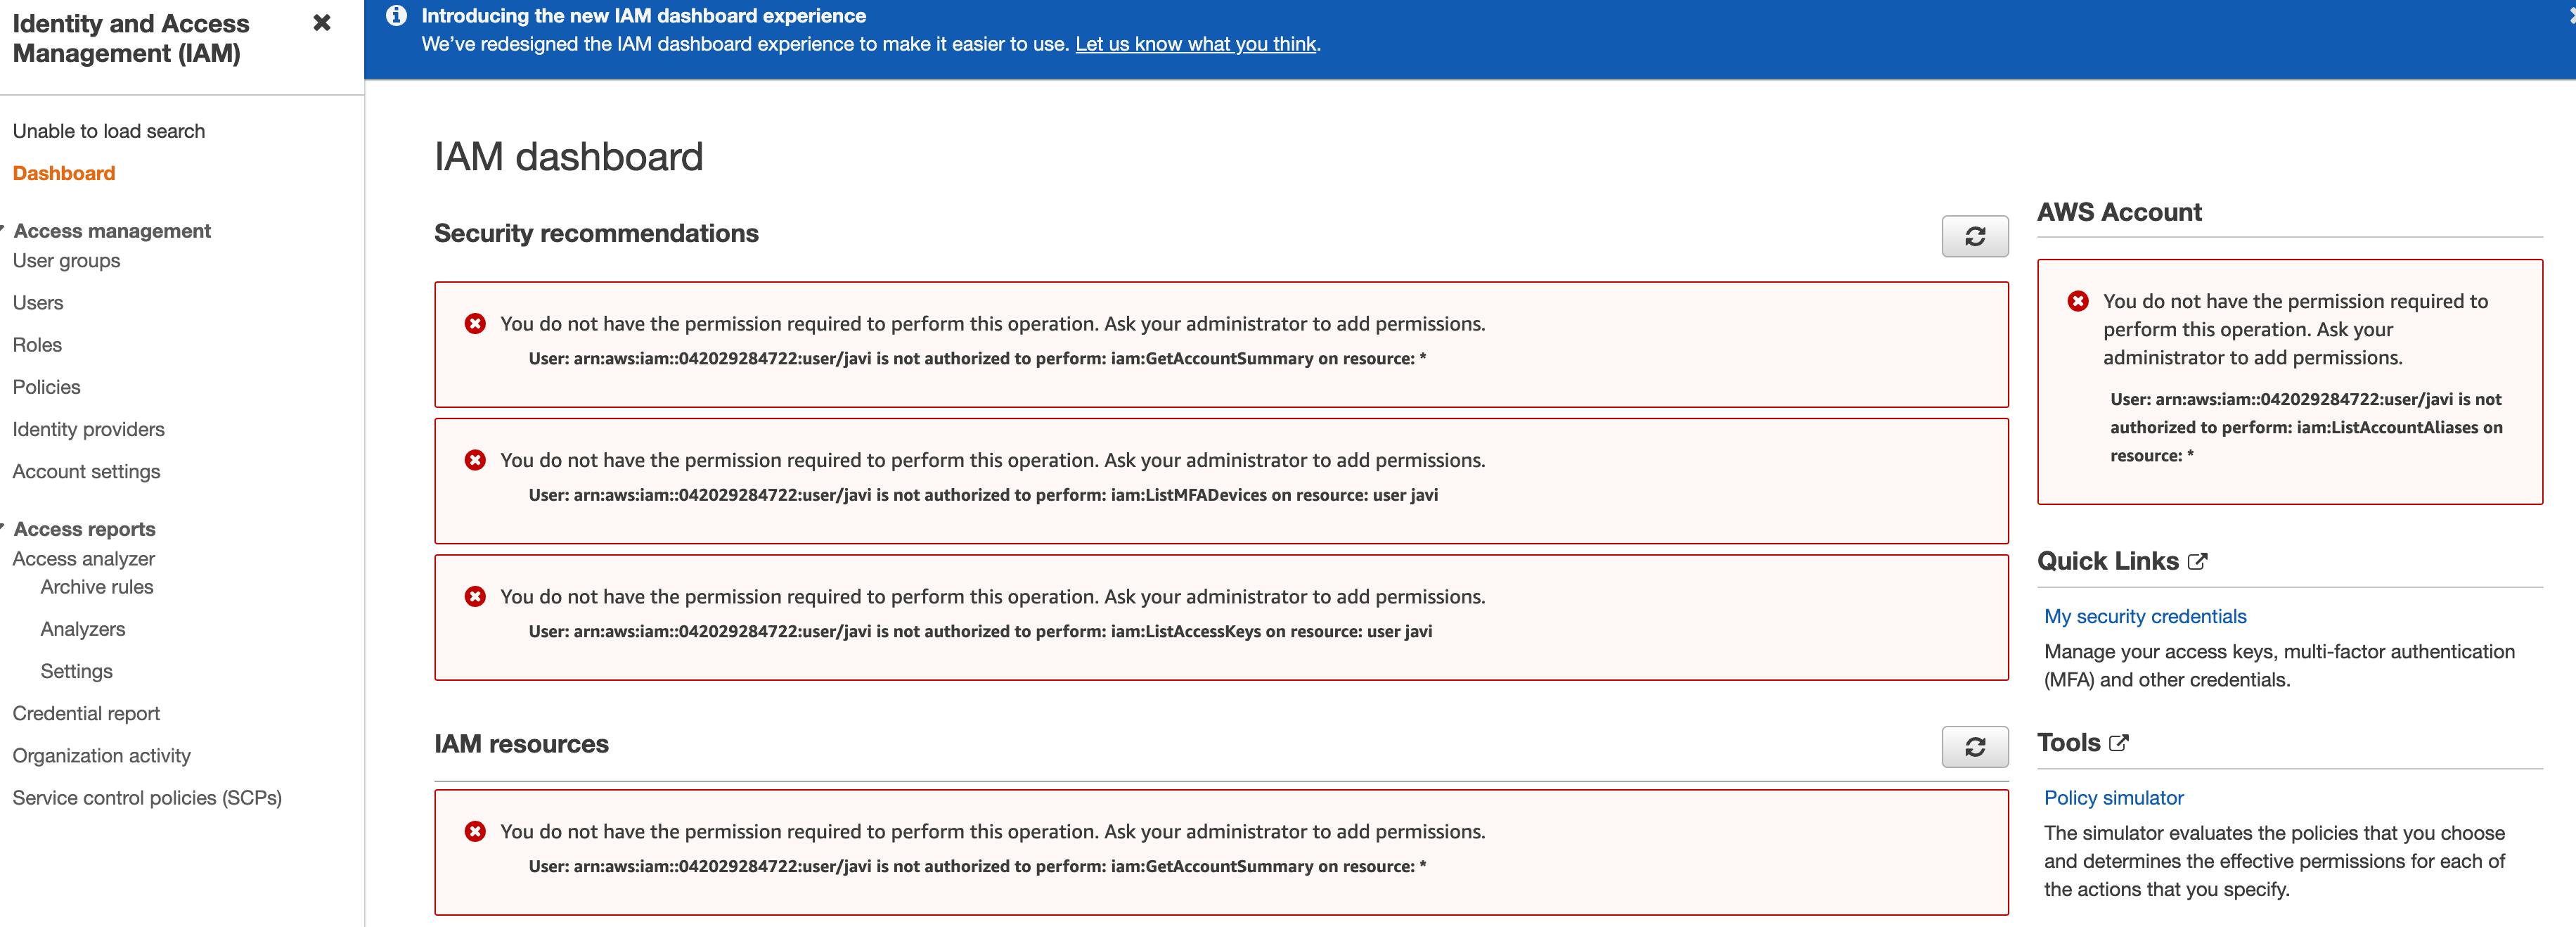
That was expected!
Now look for the s3 service in the search box and create a new bucket. (An S3 bucket is just a place where we can save any kind of files in the cloud).

To do that, in the S3 UI select Create bucket, then select a unique name for your bucket and let the rest of options with default values.

Congratulations, not only you have set up an AWS account, but you have also created your first user, managed its permissions, and created an S3 bucket using that same user! 👏
Now, let's see other ways of interacting with AWS that are not through an UI.
The AWS CLI
Apart from using the AWS Management console, there are programmatic ways of managing our AWS account and services. Programmatic means that is not done using a visual UI, but directly typing commands in a text console, or using code.
The AWS CLI is one of these programmatic ways. It allows us to do almost anything that can be done in the Web UI, but using text commands.
Let's see how to configure it.
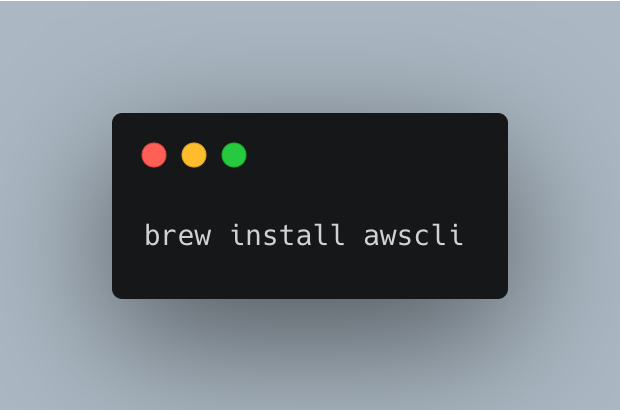
Installing the AWS CLI
For detailed instructions on how to install AWS CLI on different Operating systems, go to this link .
For Mac OS, I usually just install it with homebrew:
Configuring the credentials for the AWS CLI
Once installed, open a new terminal window, and type the aws configure command.
It will prompt you for your user's key id and secret, which you wrote down when you created the IAM user. (If you didn't wrote them down, your root user can assign a new pair of credentials)
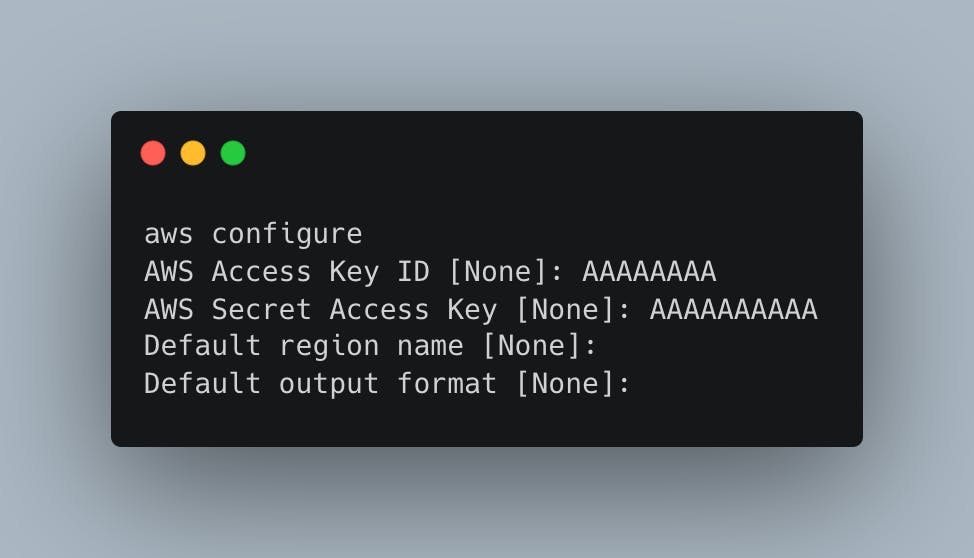
This command will generate a file in ~/.aws/credentials with the default auth credentials that will be used by AWS CLI.
Running commands with the CLI
AWS CLI has a ton of commands and subcommands, since it can manage almost all AWS services.
Now that we have our CLI configured with our IAM user credentials, we will keep it simple and just learn how to deal with the help command, check that the IAM user permissions still apply, and try to list our S3 buckets.
The (very verbose) general help can be accessed with the command aws help.
In general, with the CLI we will need to type a command, a subcommand and some parameters.
E.g: To see the help of the aws s3 command, type aws s3 help
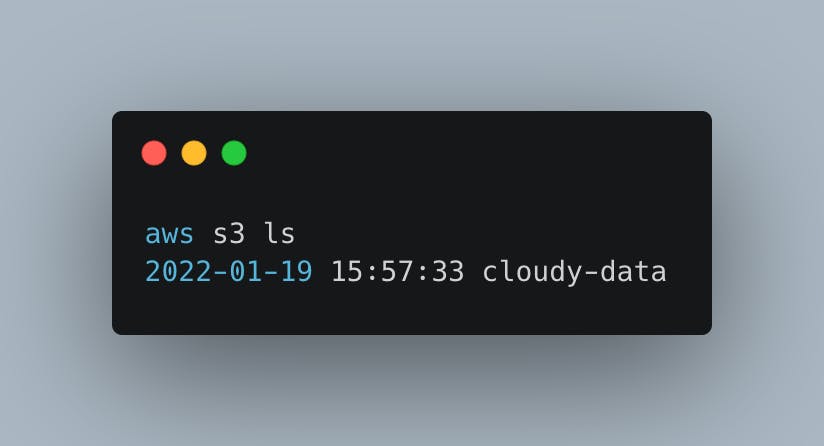
To list the buckets in our account:
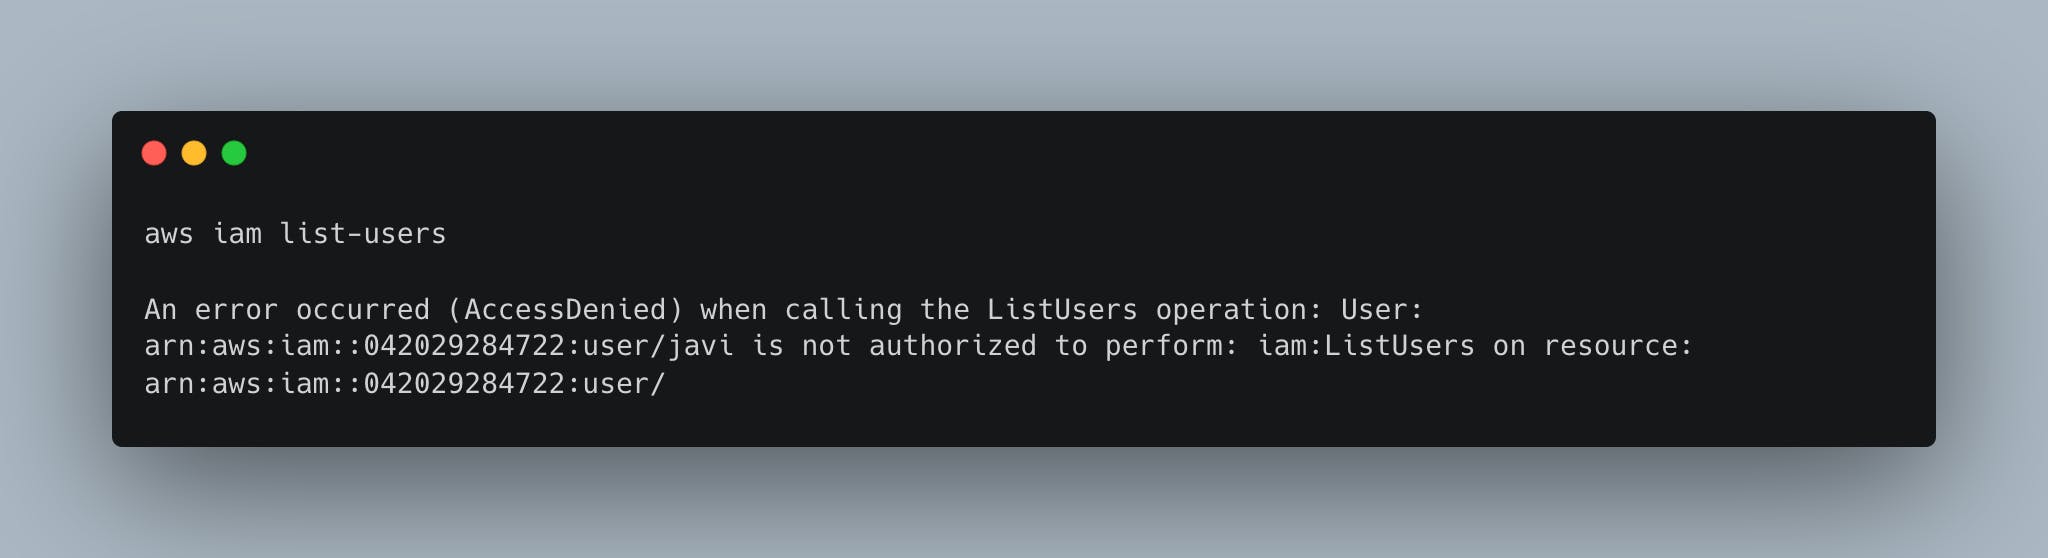
If we try to list our IAM users, we will get an error, since our user can't do that!
And that's it! as you can see, we are interacting with our AWS account from the terminal, without any UI. There is a ton of things you can do with the AWS CLI, this is just the beginning!
Boto3 library
If you prefer managing your AWS resources from code instead of typing commands in the shell, or creating bash scripts, boto3 is a great library to do exactly that from Python code.
It's an official AWS library, that is really up to date with AWS new services, and gives us a lot of flexibility for managing AWS from python code.
Let's see an example from scratch. Imagine I want to write a python script that runs every hour and creates a data file and uploads it to S3.
We want to use our recently created S3 bucket, and we want our script to put the file in a path that represents the execution timestamp.
Let's see how to do it.
First things first, you will need to install boto3.
If you use pip it's as simple as executing pip install boto3 in your python environment.
Then, you can create a python script like the following one, to create a file and upload it to an S3 bucket, using a path that contains the date and hour when the script is executed:
import sys
import boto3
from datetime import datetime
import os


S3_PREFIX = "awsintro"

def create_random_data():
    """Creates meaningless bytes of data"""
    return bytes("random_data", "utf-8")

def build_path():
    """Builds a file path based on the current time"""
    now = datetime.now()
    # build a path like "awsintro/2022/01/10/23":
    return os.path.join(S3_PREFIX, str(now.year), str(now.month), str(now.day), str(now.hour), "data.txt")

def upload_data_to_s3(bucket: str):
    s3 = boto3.client("s3")
    print("creating data...")
    data = create_random_data()
    print("creating path...")
    s3_key = build_path()
    print(f"Uploading data to bucket {bucket} and key {s3_key}...")
    s3.put_object(Body=data, Bucket=bucket, Key=s3_key)


if __name__ == '__main__':
    bucket = sys.argv[1]
    upload_data_to_s3(bucket=bucket)
Then, run the python script passing your bucket name as a parameter:

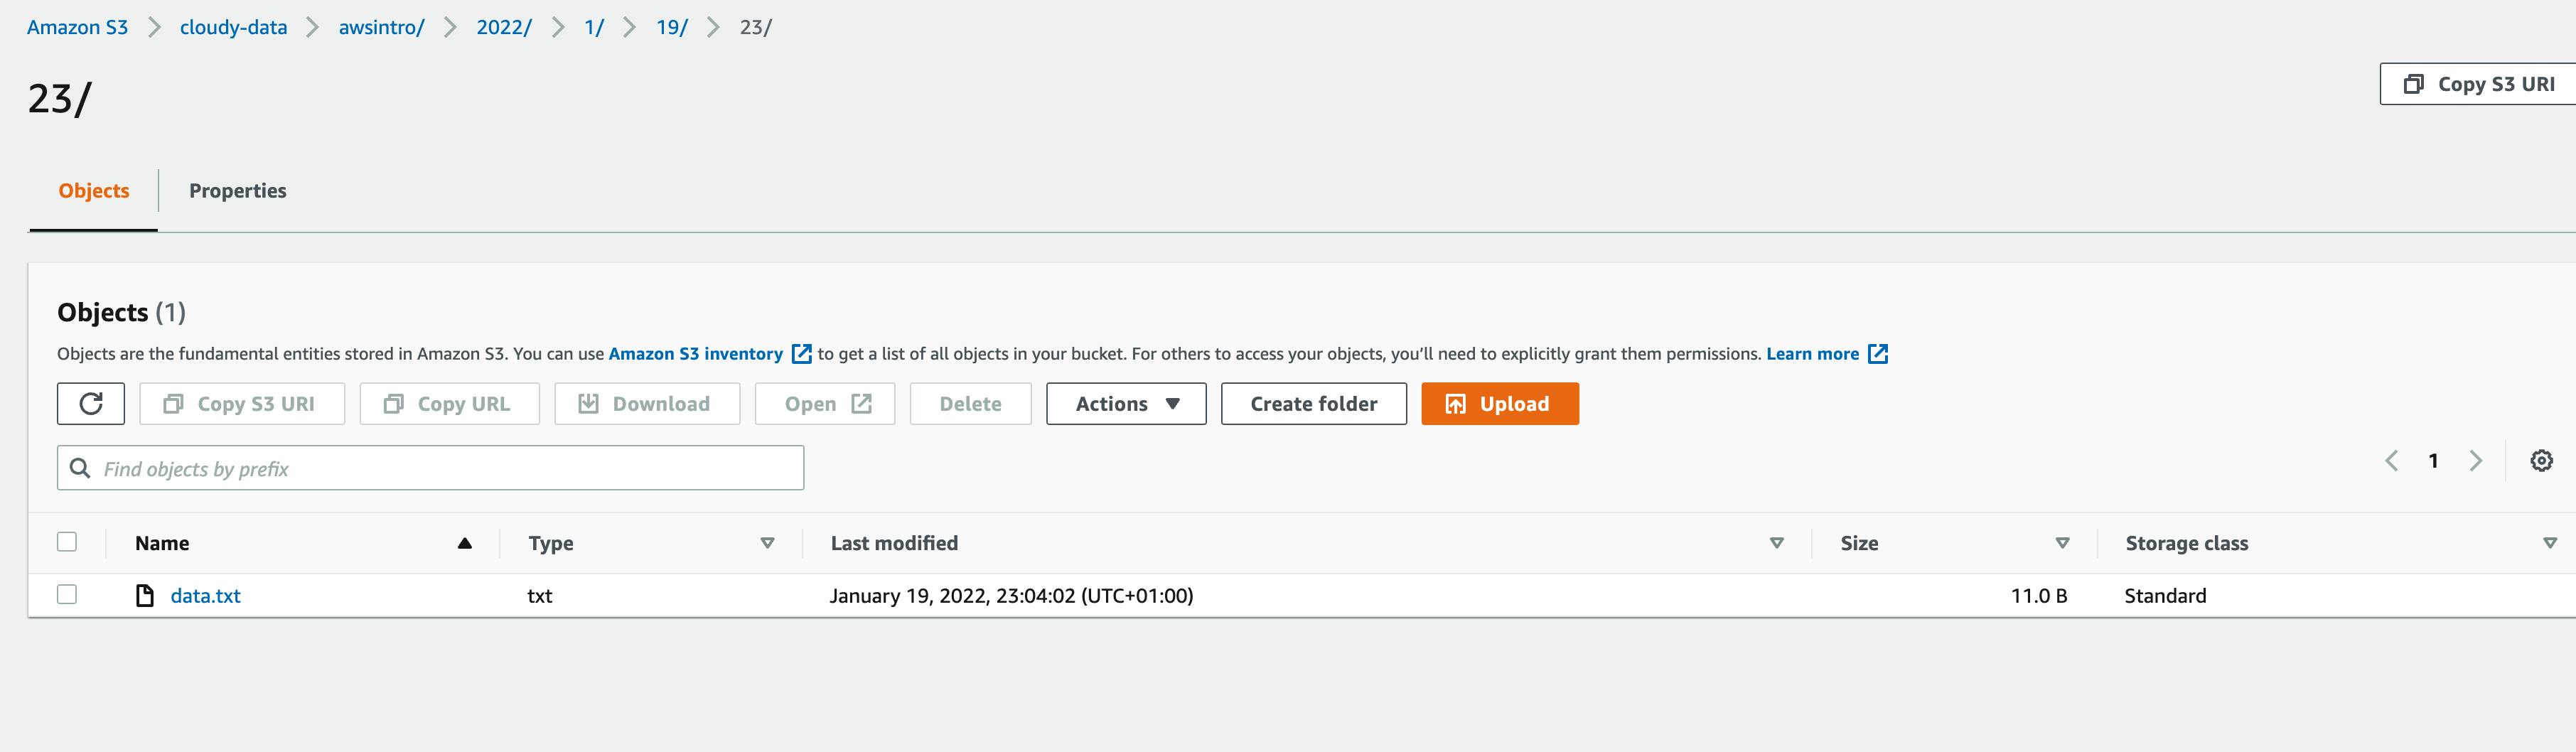
And Voilà! If you go to the web console you will see a new text file in your bucket containing the data you put in your python script!
You can also list the file using the AWS CLI:
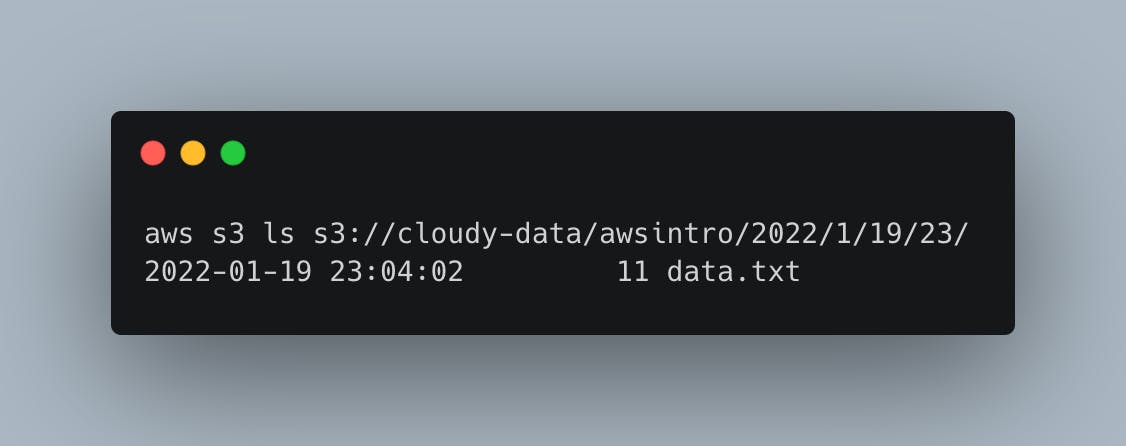
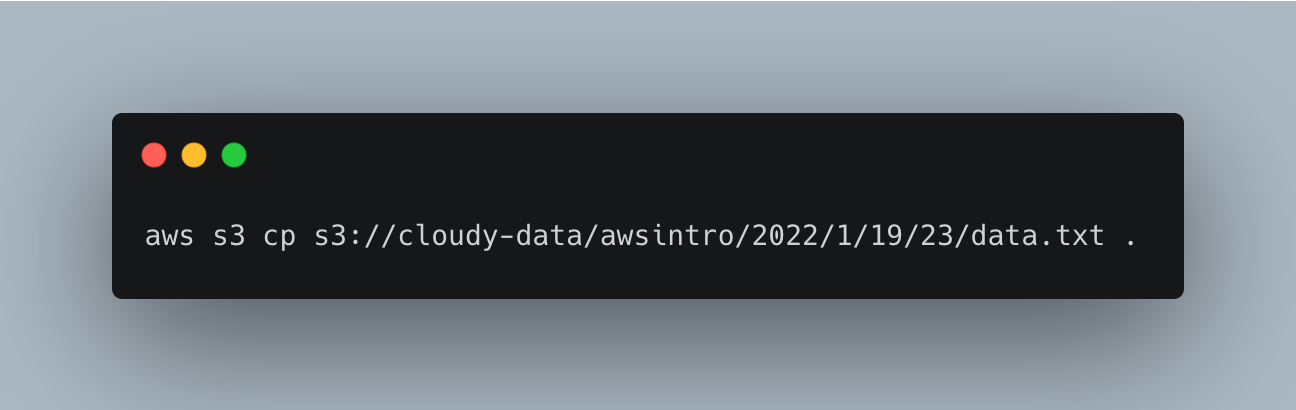
Note that your bucket name and path will be different!
You can also download the file from S3 to local using the AWS CLI with the following command (again, your bucket and path will differ):
Summary
Although AWS is a complex beast, we have seen how to:
- create a new account
- start using the AWS web management console
- create a IAM User
- install and configure the AWS CLI
- deal with AWS from python code using boto3
Not bad for a first approach!
This is only the beginning, and I hope this has been helpful for making your first steps with AWS a little bit easier.